πŸš€ What is BLoC?

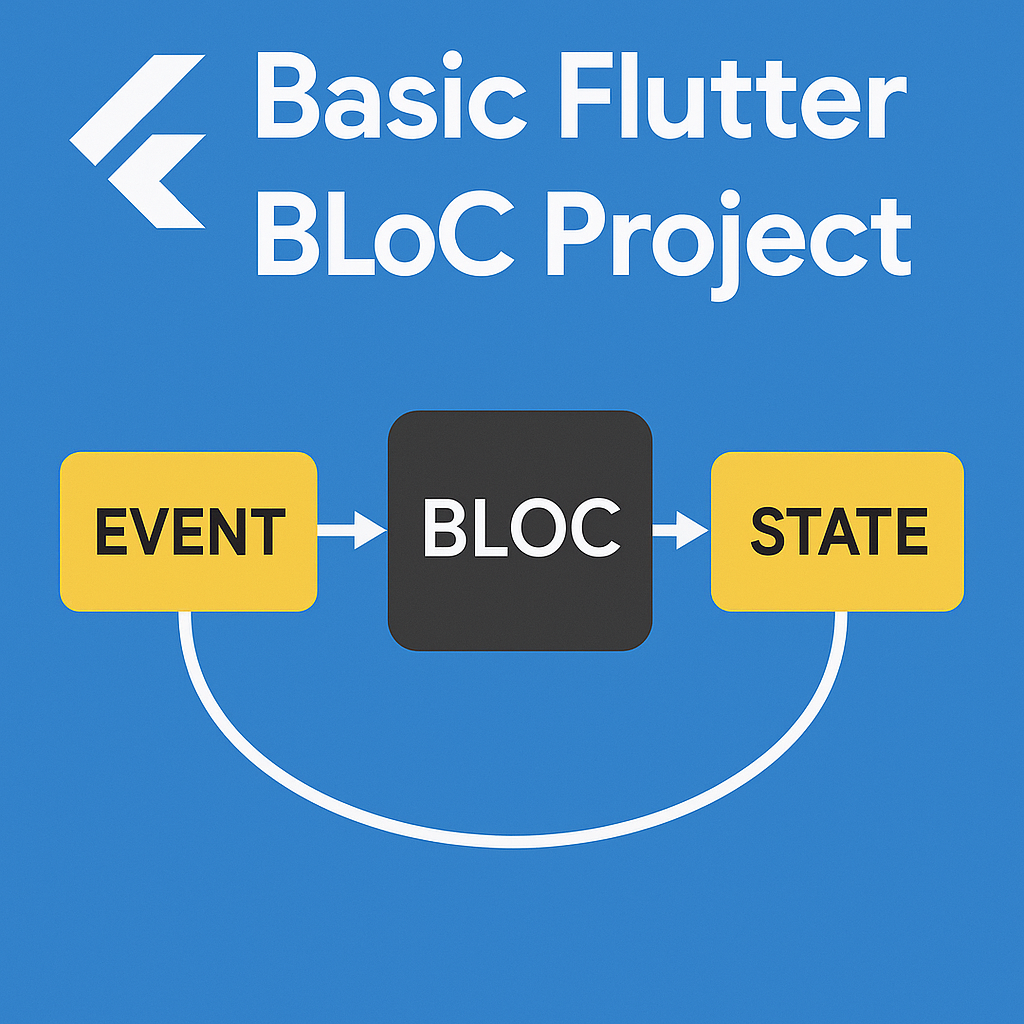
BLoC (Business Logic Component) is a predictable state management pattern that separates business logic from the UI. It uses:

  • Events to trigger actions

  • States to reflect changes

  • Streams to communicate between UI and logic

This separation makes apps more scalable and easier to test.


πŸ› οΈ Project Setup

  1. Create a Flutter project

    flutter create flutter_bloc_counter cd flutter_bloc_counter
  2. Add dependencies in pubspec.yaml:

    flutter_bloc: ^8.1.1
  3. Folder structure:

    lib/ β”œβ”€β”€ bloc/ β”‚ β”œβ”€β”€ counter_bloc.dart β”‚ β”œβ”€β”€ counter_event.dart β”‚ └── counter_state.dart └── main.dart

πŸ“‚ Step-by-Step BLoC Implementation

1. counter_event.dart

abstract class CounterEvent {} class Increment extends CounterEvent {} class Decrement extends CounterEvent {}

2. counter_state.dart

class CounterState { final int count; CounterState(this.count); }

3. counter_bloc.dart

import 'package:flutter_bloc/flutter_bloc.dart'; import 'counter_event.dart'; import 'counter_state.dart'; class CounterBloc extends Bloc<CounterEvent, CounterState> { CounterBloc() : super(CounterState(0)) { on<Increment>((event, emit) => emit(CounterState(state.count + 1))); on<Decrement>((event, emit) => emit(CounterState(state.count - 1))); } }

4. main.dart

import 'package:flutter/material.dart'; import 'package:flutter_bloc/flutter_bloc.dart'; import 'bloc/counter_bloc.dart'; import 'bloc/counter_event.dart'; import 'bloc/counter_state.dart'; void main() { runApp(MyApp()); } class MyApp extends StatelessWidget { @override Widget build(BuildContext context) { return MaterialApp( home: BlocProvider( create: (_) => CounterBloc(), child: CounterPage(), ), ); } } class CounterPage extends StatelessWidget { @override Widget build(BuildContext context) { final counterBloc = context.read<CounterBloc>(); return Scaffold( appBar: AppBar(title: Text('Flutter BLoC Counter')), body: Center( child: BlocBuilder<CounterBloc, CounterState>( builder: (context, state) => Text('${state.count}', style: TextStyle(fontSize: 50)), ), ), floatingActionButton: Row( mainAxisAlignment: MainAxisAlignment.end, children: [ FloatingActionButton( onPressed: () => counterBloc.add(Decrement()), child: Icon(Icons.remove), ), SizedBox(width: 10), FloatingActionButton( onPressed: () => counterBloc.add(Increment()), child: Icon(Icons.add), ), ], ), ); } }

🎯 Output

A clean UI with a counter in the middle and two buttons (+ and -) to increment or decrement the count, all powered by the BLoC pattern.


🧠 Why Use BLoC?

  • Decouples UI and logic

  • Easy to test

  • Scalable

  • Community support (used in production apps)


πŸ“Œ Conclusion

If you're just starting with Flutter BLoC, this basic project is a perfect entry point. Once you're comfortable, you can explore hydrated_bloc, flutter_hooks, or more complex multi-featured apps.

Ready to dive deeper into Flutter BLoC? Stay tuned for more tutorials!